Introduction
So, you’ve decided to dive into the world of triathlons—congratulations! Taking on a triathlon is a unique challenge, combining three demanding sports into one exhilarating event. It’s common to feel a mix of excitement and nerves as you begin. This guide is here to break down the essentials, from what to expect on race day to how to prepare and equip yourself for success. Let’s get started!
Your first triathlon
What to Expect at Your First Triathlon
Starting a triathlon for the first time can feel overwhelming, but knowing the typical flow of the event and what each stage entails can help ease those pre-race nerves. Triathlons are highly organized, with set protocols that make sure everything runs smoothly, from registration to the finish line. Here’s a breakdown of each stage so you know exactly what to expect.
The Night Before the Race
Preparing the night before can make your race day much smoother. Here’s what to consider:
Get a Good Night’s Sleep: You might feel nervous, but try to get a full night’s sleep. You’ll need your energy! However, sleep in the nights preceding a race contribute significantly to race-day energy so don’t worry too much.
Check Your Gear: Double-check your gear bag to make sure you have everything you need for each discipline (swim, bike, run) and transitions. Lay out your wetsuit, goggles, swim cap, bike, helmet, cycling shoes, running shoes, race bib, and any nutrition you plan to take with you.
Review the Race Pack: Most races provide a pack with your race number, course map, and timing chip. Familiarize yourself with the map, especially transition areas, entry/exit points for each discipline, and finish lines.
Fuel Up and Hydrate: Make sure to have a balanced, easy-to-digest meal and start hydrating for the next day.
Race Morning Routine
On race morning, the energy is high, and everyone is focused on setting up and getting ready. Give yourself plenty of time to get situated without feeling rushed.
Arrival and Check-In
Timing Chip: You’ll receive a timing chip to wear around your left ankle (to avoid the bike chain), which tracks your progress through each segment of the race.
Arrive Early: Most races recommend arriving at least an hour or two before the start. This gives you time to park, check-in, set up in the transition area, and make any last-minute adjustments.
Body Marking / Bibs: The race may include transfers to place on your arm. Often though, bib numbers are all that’s provided / required.
Setting Up Your Transition Area
The Transition Area: This is where you’ll switch between each discipline—swimming to biking, and biking to running. Each athlete has an assigned spot to lay out their gear. Although this can differ per race. It’s possible that your gear will remain in bags until transitions and transition areas can also be in different locations.The race briefing will make this clear. Make a note of where your area / bike is. Look for landmarks to help you find it in the heat of the race. Leave the bike in an easy gear to start off well.
Organize Your Gear for Quick Access: Lay out your equipment in the order you’ll need it, and practice visualizing the transition to make it smoother.
The Swim Start
The swim leg is often the most challenging part for beginners, especially in open water. Here’s what to expect and how to stay calm:
Types of Swim Starts
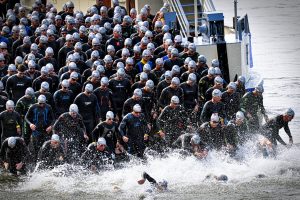
- Mass Start: All athletes start at the same time. It can be chaotic, with lots of splashing and jostling for space.
- Wave Start: Athletes are grouped by age or skill level, starting in “waves” a few minutes apart. This can be less crowded and stressful.
- Rolling Start: Athletes start one by one, often with timing chips activated as each person enters the water, providing a more relaxed beginning.
Entering the Water
If you’re new to open water, you might feel anxious. Take a few deep breaths, try not to run and raise your heart-rate too high, and if you’re uncomfortable, stay toward the back or side of the group to avoid the busiest areas. Focus on establishing a calm, steady stroke rather than rushing.
Sight and Navigate
During the swim, it’s easy to drift off course. Learn to “sight” every few strokes by lifting your head to spot markers, such as buoys, which keep you on track toward the finish. Don’t assume the person in front of you is going the right way.
Transition 1 (Swim to Bike)
After finishing the swim, it’s time to transition to the bike leg. The clock keeps running, so practice this switch ahead of time to save valuable minutes. It’s common practice to take the wetsuit off down to the waist as you exit the water, to speed up transition.
Exiting the Water and Finding Your Bike
As you exit the water, volunteers or signs will direct you toward the transition area. This area can feel disorienting, so locate your transition spot ahead of time. If you wear a wetsuit, practice removing it quickly to avoid fumbling.
Transitioning to Cycling Gear
- Grab your helmet (mandatory before touching your bike), cycling shoes, and any other gear.
- Remember any nutrition or water you want for the bike leg, especially for longer races.
The Bike Leg
The bike leg lets you cover the most ground and regain your energy. Pace yourself to avoid fatigue during the final run leg. Use the bike leg to refuel ahead of the run if necessary.
Course and Pace
- Triathlon bike courses vary, from flat loops to hilly routes. Knowing the course helps you pace yourself and avoid pushing too hard on challenging segments.
- Focus on smooth, steady pedalling, saving your energy for the final leg.
Aid Stations and Nutrition
- Many courses have aid stations offering water or sports drinks. Make sure to stay hydrated, and if you need to refuel, consume easily digestible snacks.
Rules of the Road
- Triathlons have specific rules to ensure fair play, including no drafting (riding closely behind another cyclist) unless it’s a draft-legal race. Keep a safe distance and follow the race’s rules.
Transition 2 (Bike to Run)
The bike-to-run transition is often referred to as the “second transition” or “T2.” This transition can be tough on your legs, so be ready for an adjustment period.
Transitioning from Bike to Run Gear
- Rack your bike before removing your helmet, then switch to your running shoes and any other gear (hat, visor, etc.).
- Some athletes experience “jelly legs” as they start running after biking. It takes a few minutes for your legs to adapt, so don’t worry if you feel wobbly at first.
Grab and Go
- Consider running with any nutrition or hydration you need, especially if aid stations are sparse.
- Many athletes use elastic laces for running shoes, which make them faster to slip on and eliminate the need for tying.
The Run Leg
The run is the final part of the race, and it’s where you’ll get your last burst of energy (or need to dig deep to keep going).
Settling Into Your Pace
- Start the run at a comfortable pace until your legs adjust. Don’t push too hard too early—many beginners find that pacing themselves at the beginning leads to a strong finish.
Aid Stations and Staying Hydrated
- Most triathlons have regular aid stations along the run route. Take advantage of these to stay hydrated and energized, especially on warm days.
Crossing the Finish Line
After hours of hard work, the finish line is finally in sight! Here’s how to make the most of the moment:
Savour the Finish
- Whether you’re sprinting or jogging, enjoy the final stretch. Crossing the finish line is a huge accomplishment, and you deserve to savour every moment.
- Volunteers will often provide you with a medal, water, and other refreshments. Don’t rush off—take time to celebrate and take a photo to remember the day.
Post-Race Recovery
Refuel with a mix of carbohydrates and protein, and hydrate well. Rest and celebrate—you’ve earned it!
Allow yourself time to cool down and stretch. Triathlons are taxing, so give your body the recovery it deserves.